
Scrappy Bondi Dress

I love a scrap buster project, but my typical scrap busters are made with just one piece of leftover fabric and a pattern that is small enough for it. In this case I had lots of small scrap pieces left over from the same washed linen I purchased in different colors from Blackbird fabrics. I had used this linen originally to make two pairs of shorts, a dress, and pants. You can see those here, here, here, and here.
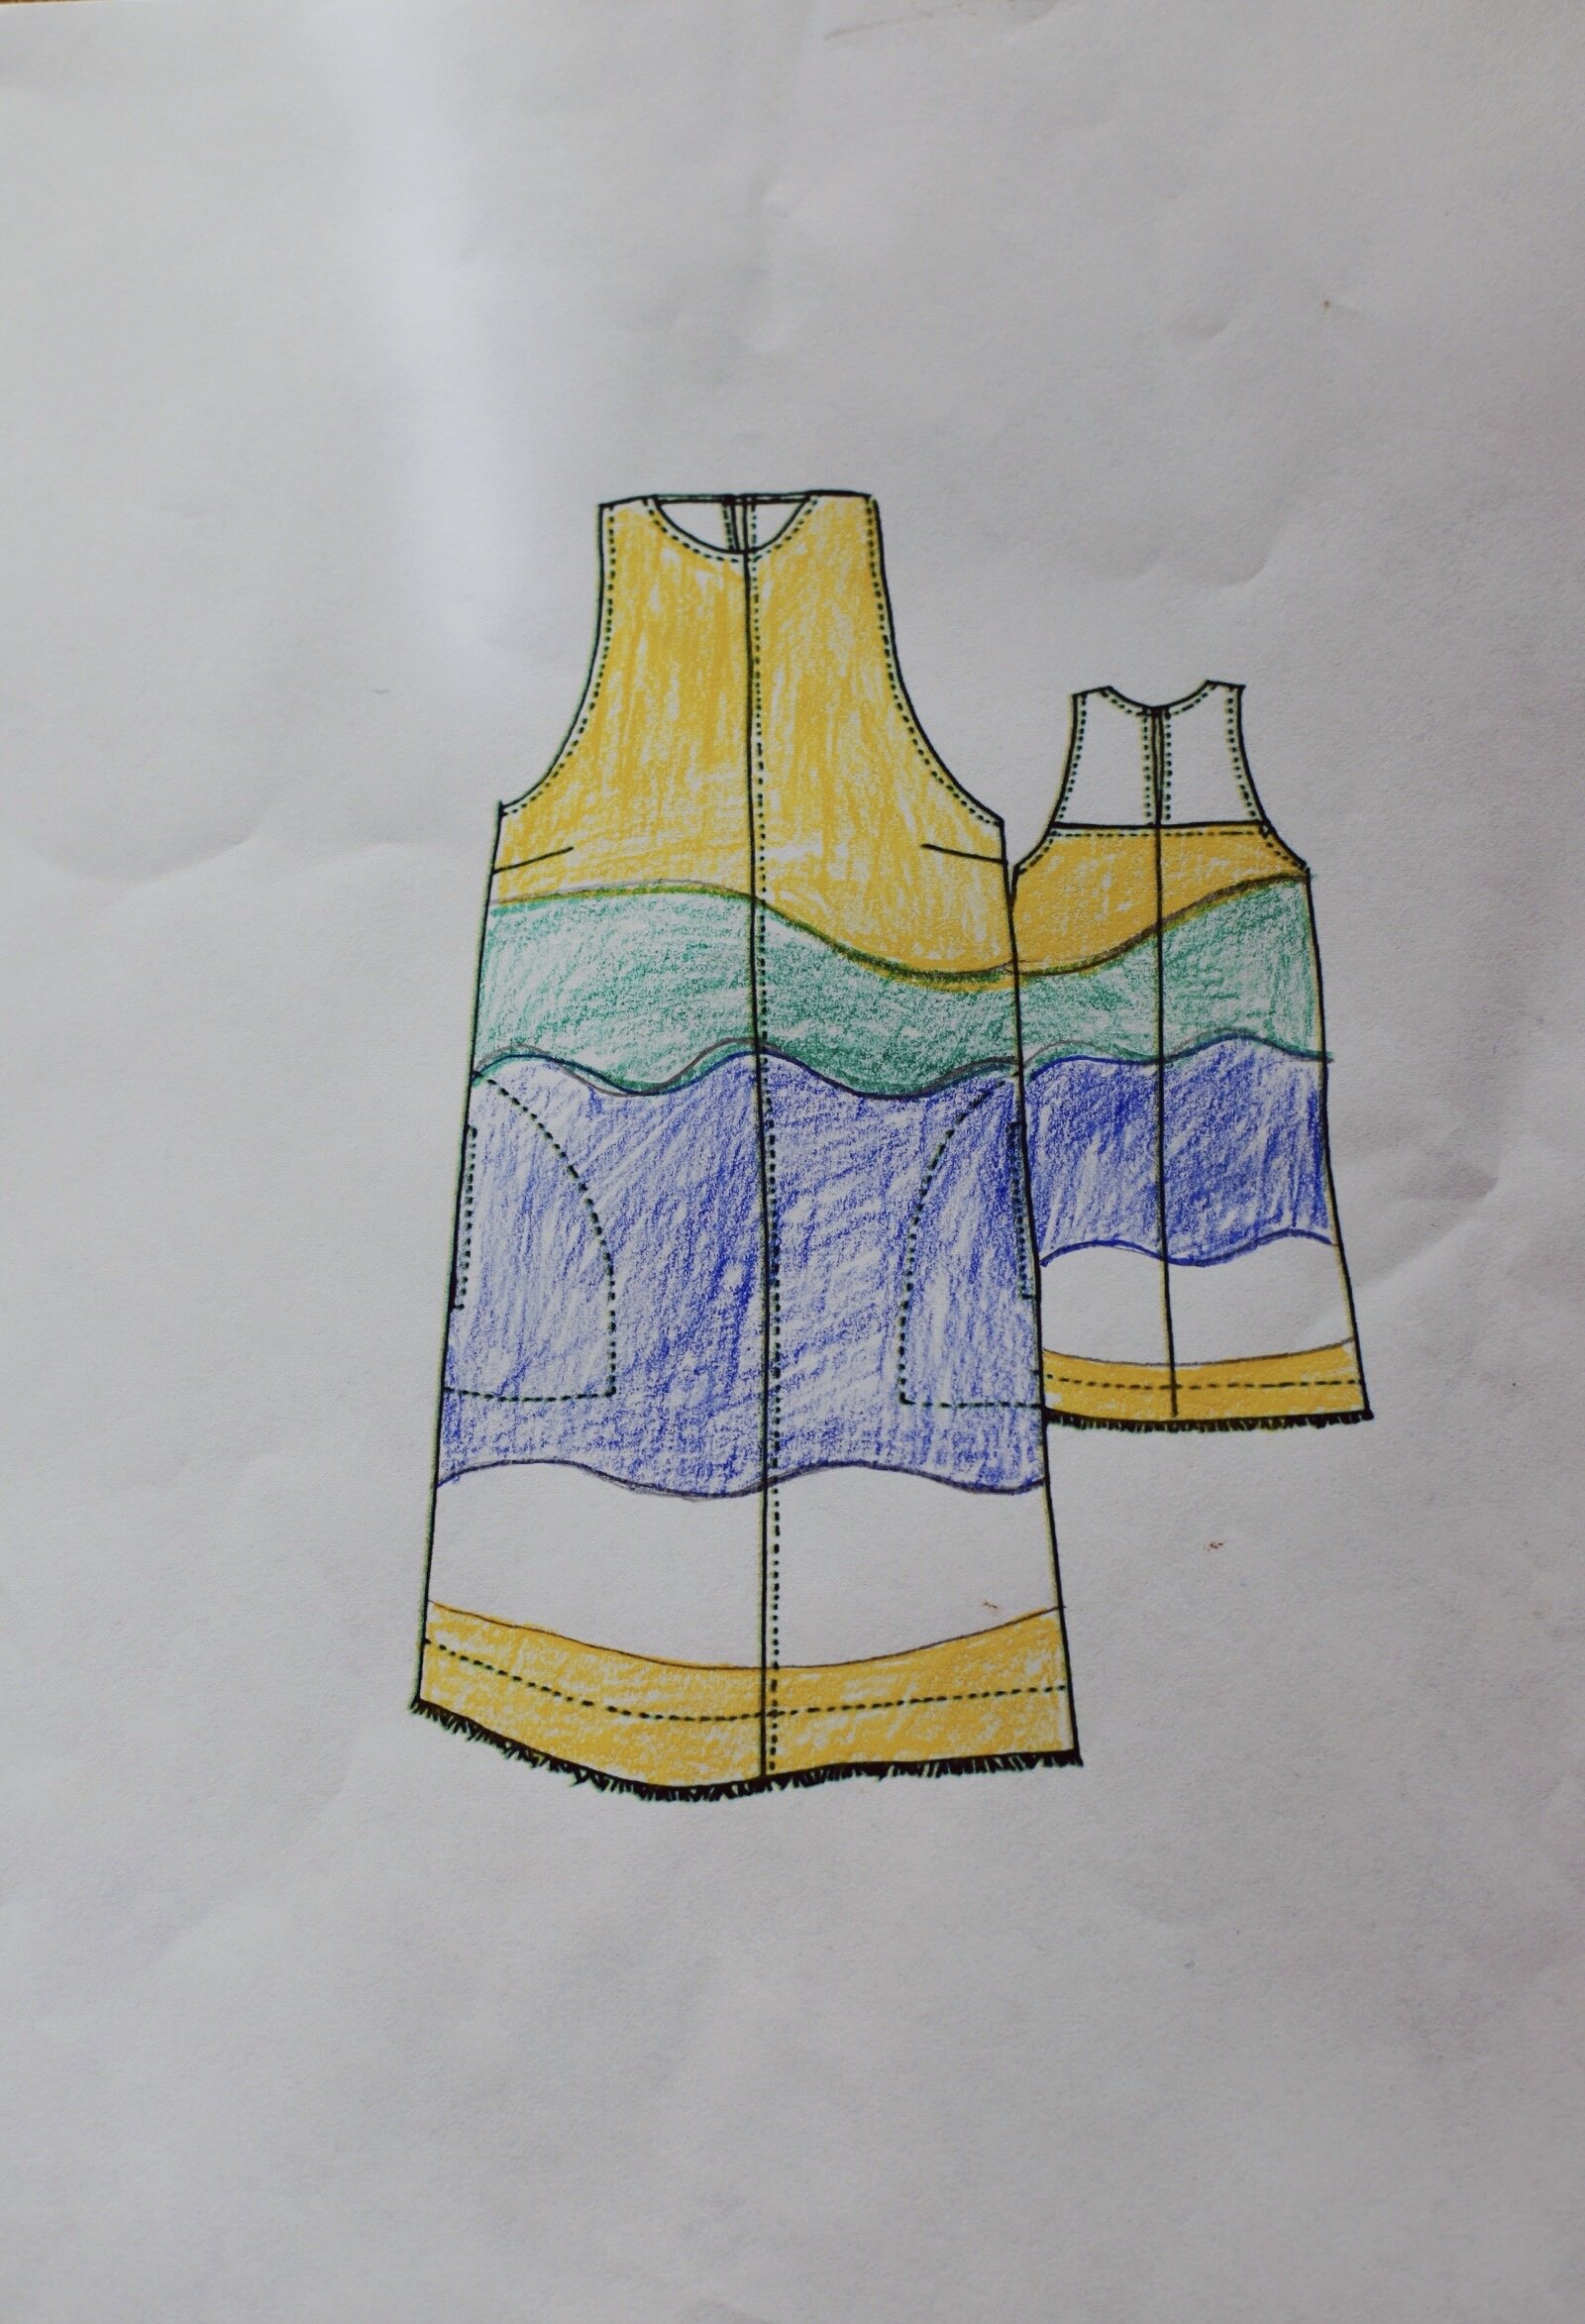
I have been wanting to use these pieces for a while, I love this washed linen and didn’t want it to go to waste. I just couldn’t decide on a project. I thought about quilting them but I wanted something a bit more organic and free form. I stumbled upon the Bondi dress, by Tessuti Patterns. This dress goes up to a 48-inch bust and a 52-inch hip. Since this is a perfect dress for sewing with linen, I decided to use this as my base for constructing my dress. It’s a simple pattern design which means it wouldn’t be too complicated to cut it into pieces and then piece them back together. There is also a front and back seam so nothing is cut on the fold and this made it a great match for a scrap buster. I started by printing out the outline drawing of the dress from the patten, got out some colored pencils and just played around with the design. It was fun to experiment with shapes and colors and Lou also enjoyed some coloring time with me as well. I decided the general vibe I was going for was a subtle wave pattern of different sizes. The color placement was just going to left up to chance to see what scraps fit where. I knew I wanted the color bands to match at the side seams so I just focused on achieving that with my scraps.
After putting the pattern together, I cut it into my desired shapes making sure the side seams would match up front to back and then added ½ inch seam allowance on each side of the pattern pieces that I cut so I could sew them back together. It was a fun puzzle project and I really enjoyed working on the design.
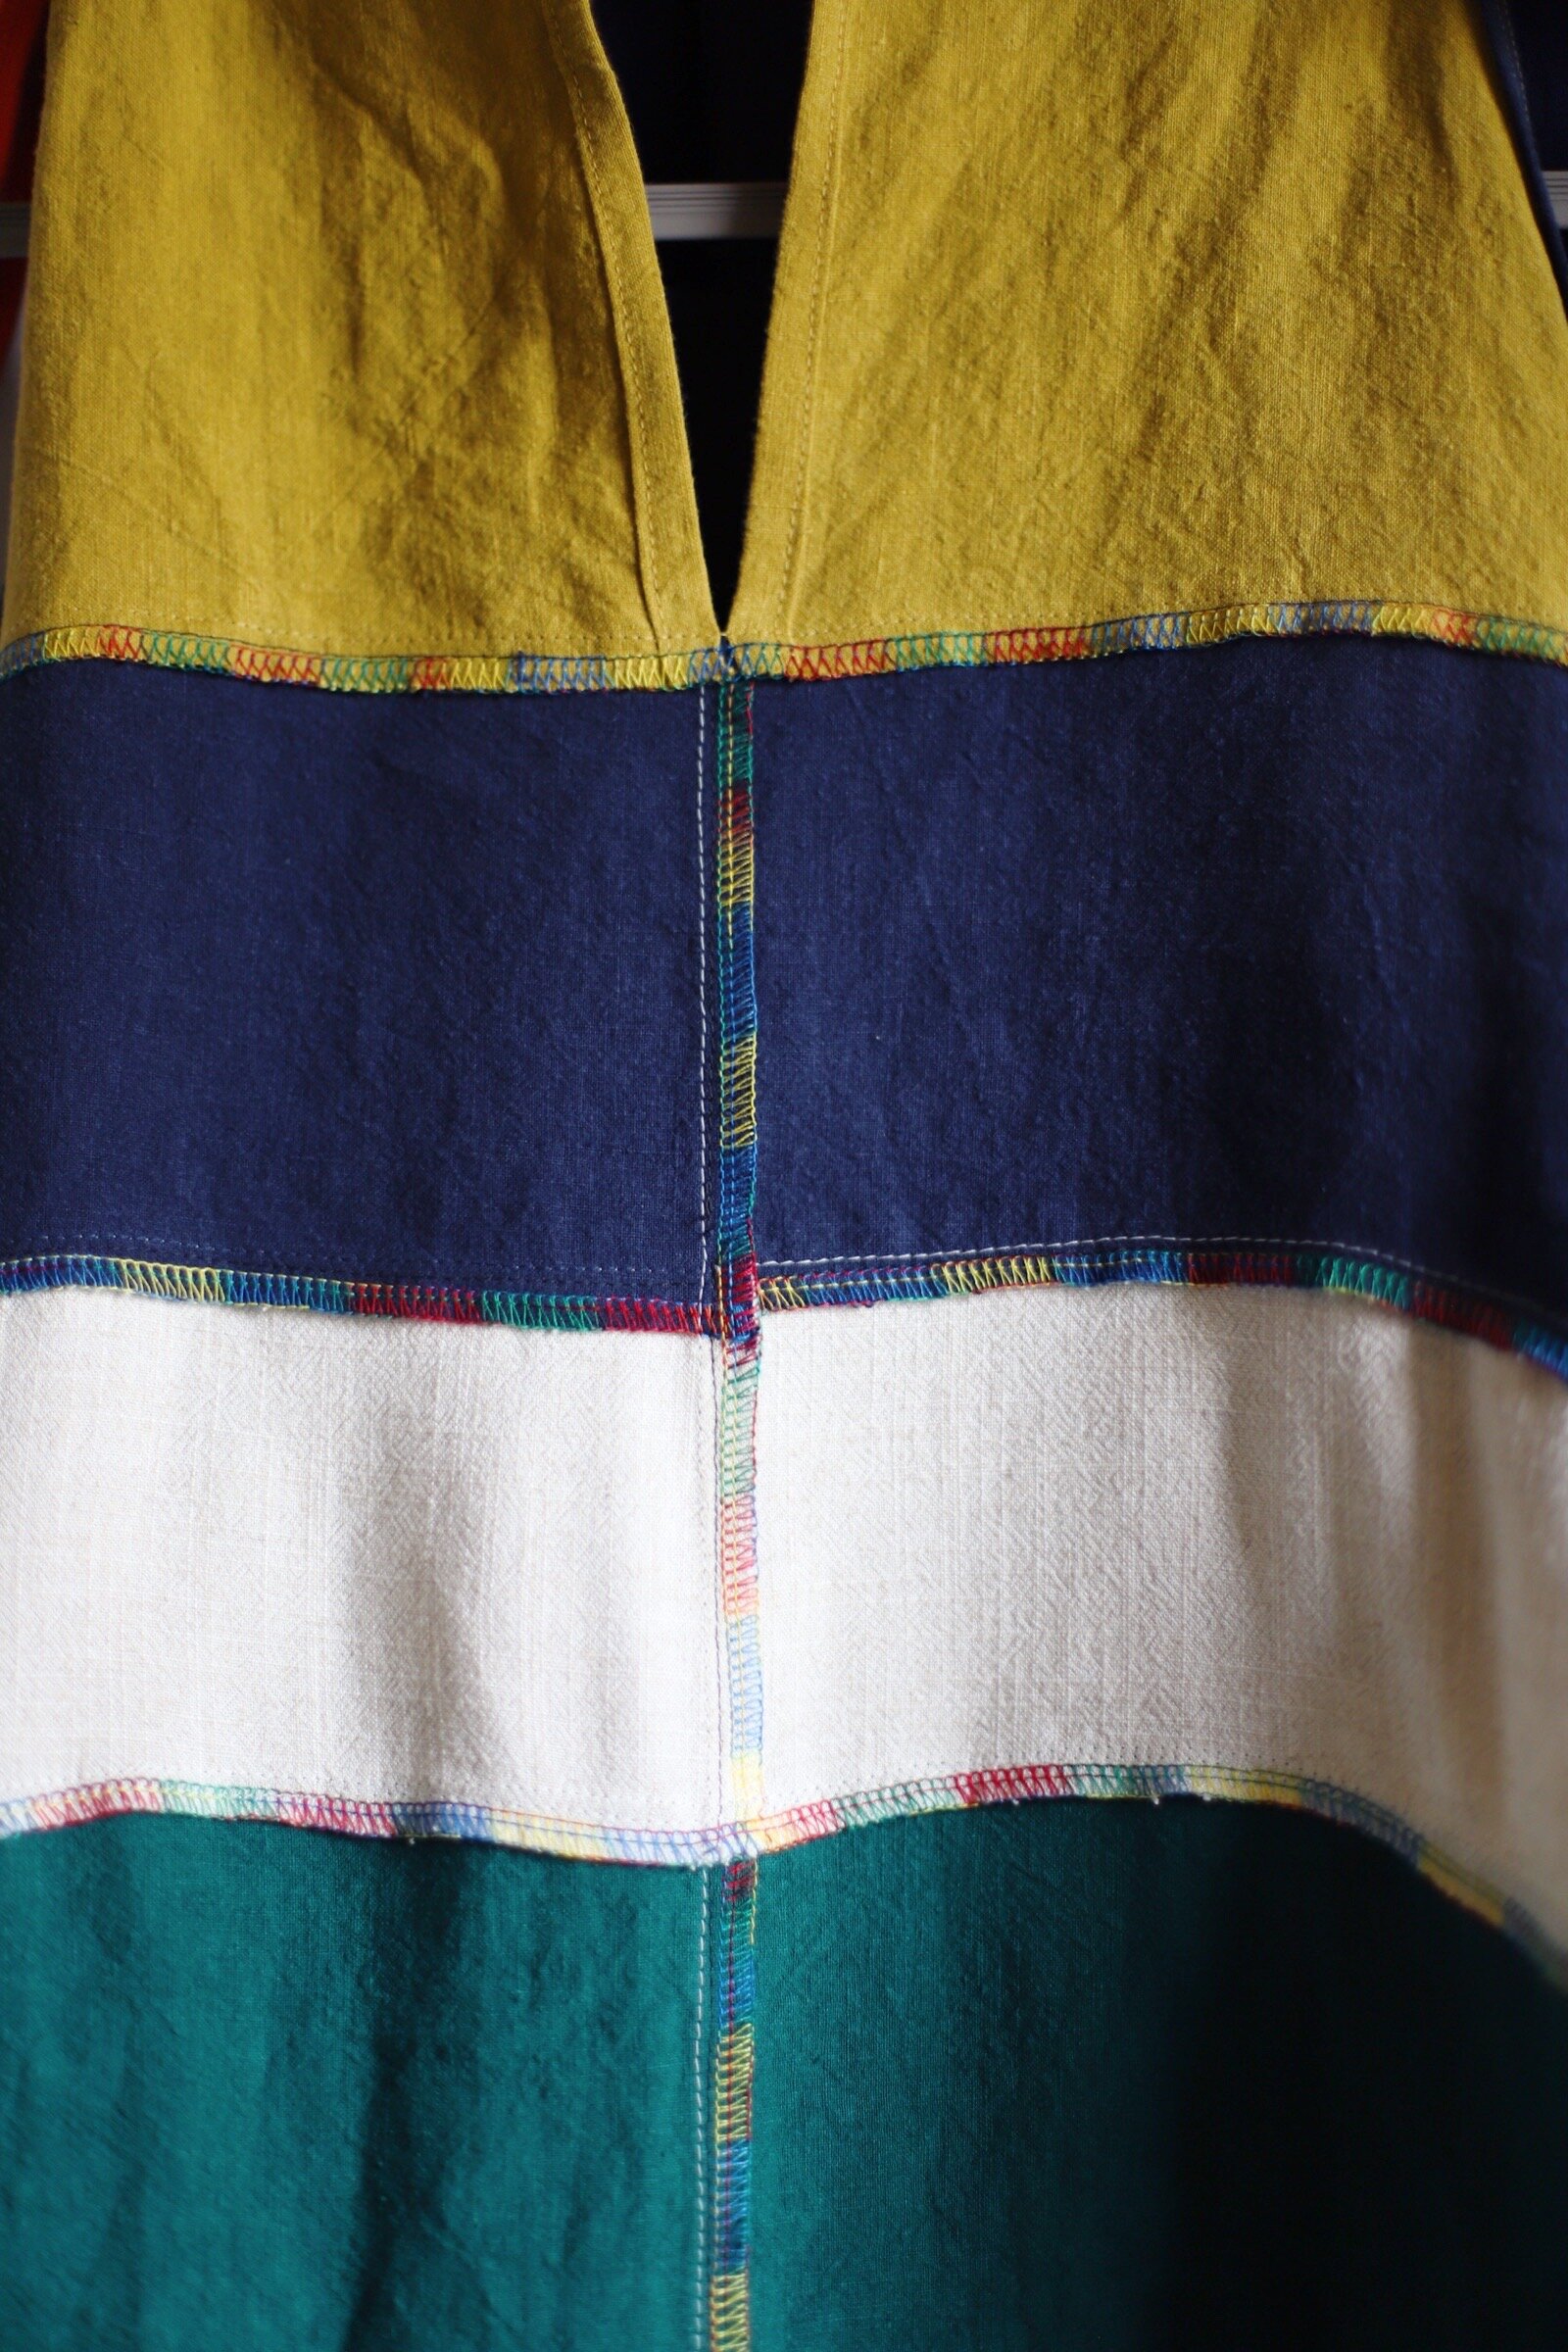
For the construction I pieced everything together so that I had each of the front and back pieces fully assembled, then just followed the sewing instructions for this pattern as you normally would. Piecing everything together took the longest because I also decided to top stitch each layer since I think it make it look more polished, plus keeps the seams flat inside the dress.
I basted the side seams and shoulder seams to do a try on before finishing the dress. At this point I did not love the fit. For reference my current measurements are bust 36, waist 30 and hips 41 inches and I’m 5’1 and I made a straight size ten in the shorter version of the dress. The main problems for me were that the bust darts were too low, the pockets were too low, and the dress was too long. It was hitting me right below my knees which is a length that I think shortens my body. I much prefer something to hit at my mid-calf, ankle, or above the knees. I didn’t want to shorten from the bottom, which is how you shorten this dress per the instructions, because while it would shorten the dress it would not resolve the fact that the pockets were too low on me. Instead, since the dress was made up of several pieces, I was able to take about 3 inches of length out of the first white section. This took some time unpicking the top stitching and recutting and sewing it back together, but it was totally worth it to shorten the dress and raise the pockets. In the future I’ll move the pockets on the pattern up three inches prior to cutting out the dress.
The other issue to resolve was the dart. Normally this would need to be changed prior to cutting the pattern, but I was able to take 1.5 inches out of the shoulder straps without messing up the neckline and since there is a button closure in the back, still able to get it over my head. Basically, this raised the neckline and the bust dart just enough. I also think a side seam dart doesn’t really make sense for this pattern since the bust isn’t fitted at the side seam. I think a mid-armhole dart would make much more sense for this pattern since the chest area is more fitted, so when I make this pattern again, I will definitely change that. I also might grade from a 10 in the hips to an 8 in the bust when I make this dress again.


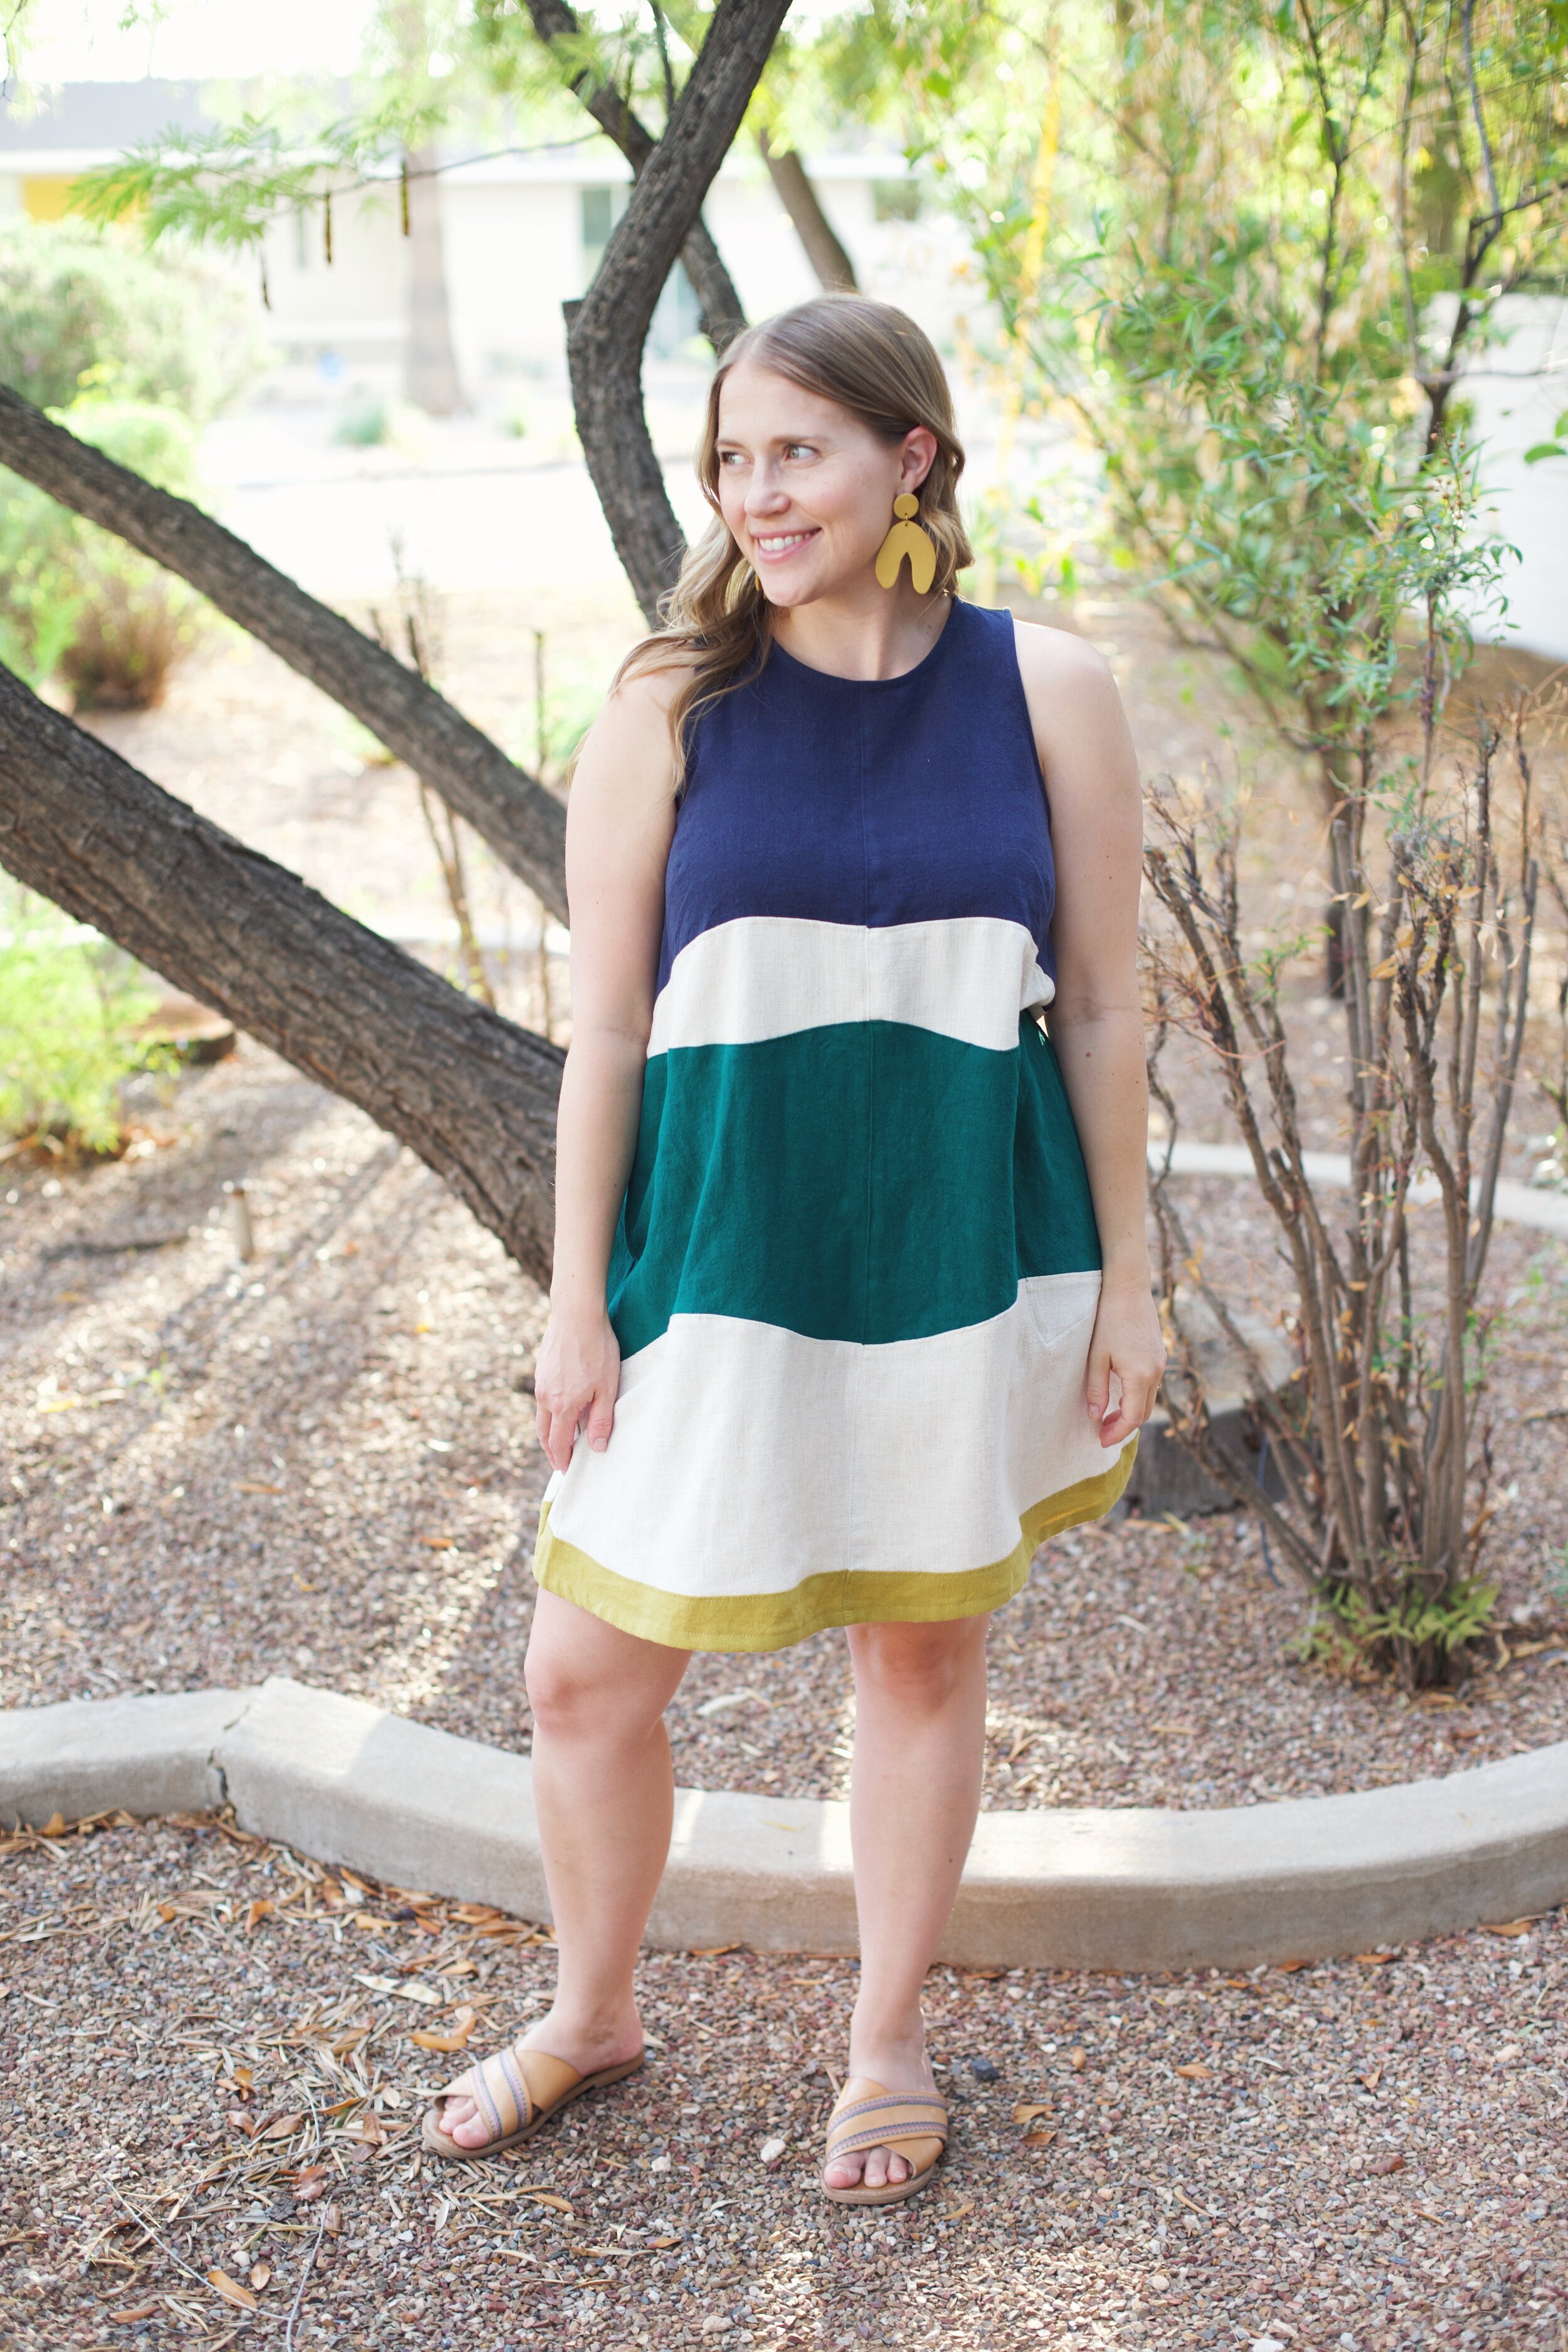
This dress was a great lesson for me because even though it’s a simple pattern it still needed adjustments. Most patterns aren’t going to fit right away. Any pattern will look better with some tailoring. This dress worked perfectly to learn that while still resulting in a wearable garment. It can make such a difference to take the time to make a muslin and then truly have a garment you love vs. something that’s just ok, but then you never end up wearing it. When in doubt make the muslin!
It feels so good to make a full garment out of scraps from other projects. I think what really helped this project work is that while the colors were different the fabric was the same and makes this look more intentional. I think the key is making sure the weight of the fabric is similar if you want to create a project like this too. I’m excited to see what else I can make with scraps in my stash!