
Alexia Dress- toile
The fabric featured in this post was kindly gifted to me by Minerva as part of their Brand Ambassadors program. All other supplies and materials were purchased by me. All thoughts and opinions are my own.
A sewing goal that I always come back to is focusing on perfecting the fit of the garments I make. I don’t expect anything to be perfect, but a few minor changes can make a substantial difference in comfort, how much you wear, and enjoy a garment. Sometimes I get so excited to make something that the toile goes out the window and I just go for it. And sure, sometimes you’ve got to strike while the iron is hot (perfect sewing proverb) but when thinking about my long-term goals with sewing, recommitting to fit is a big part of that.
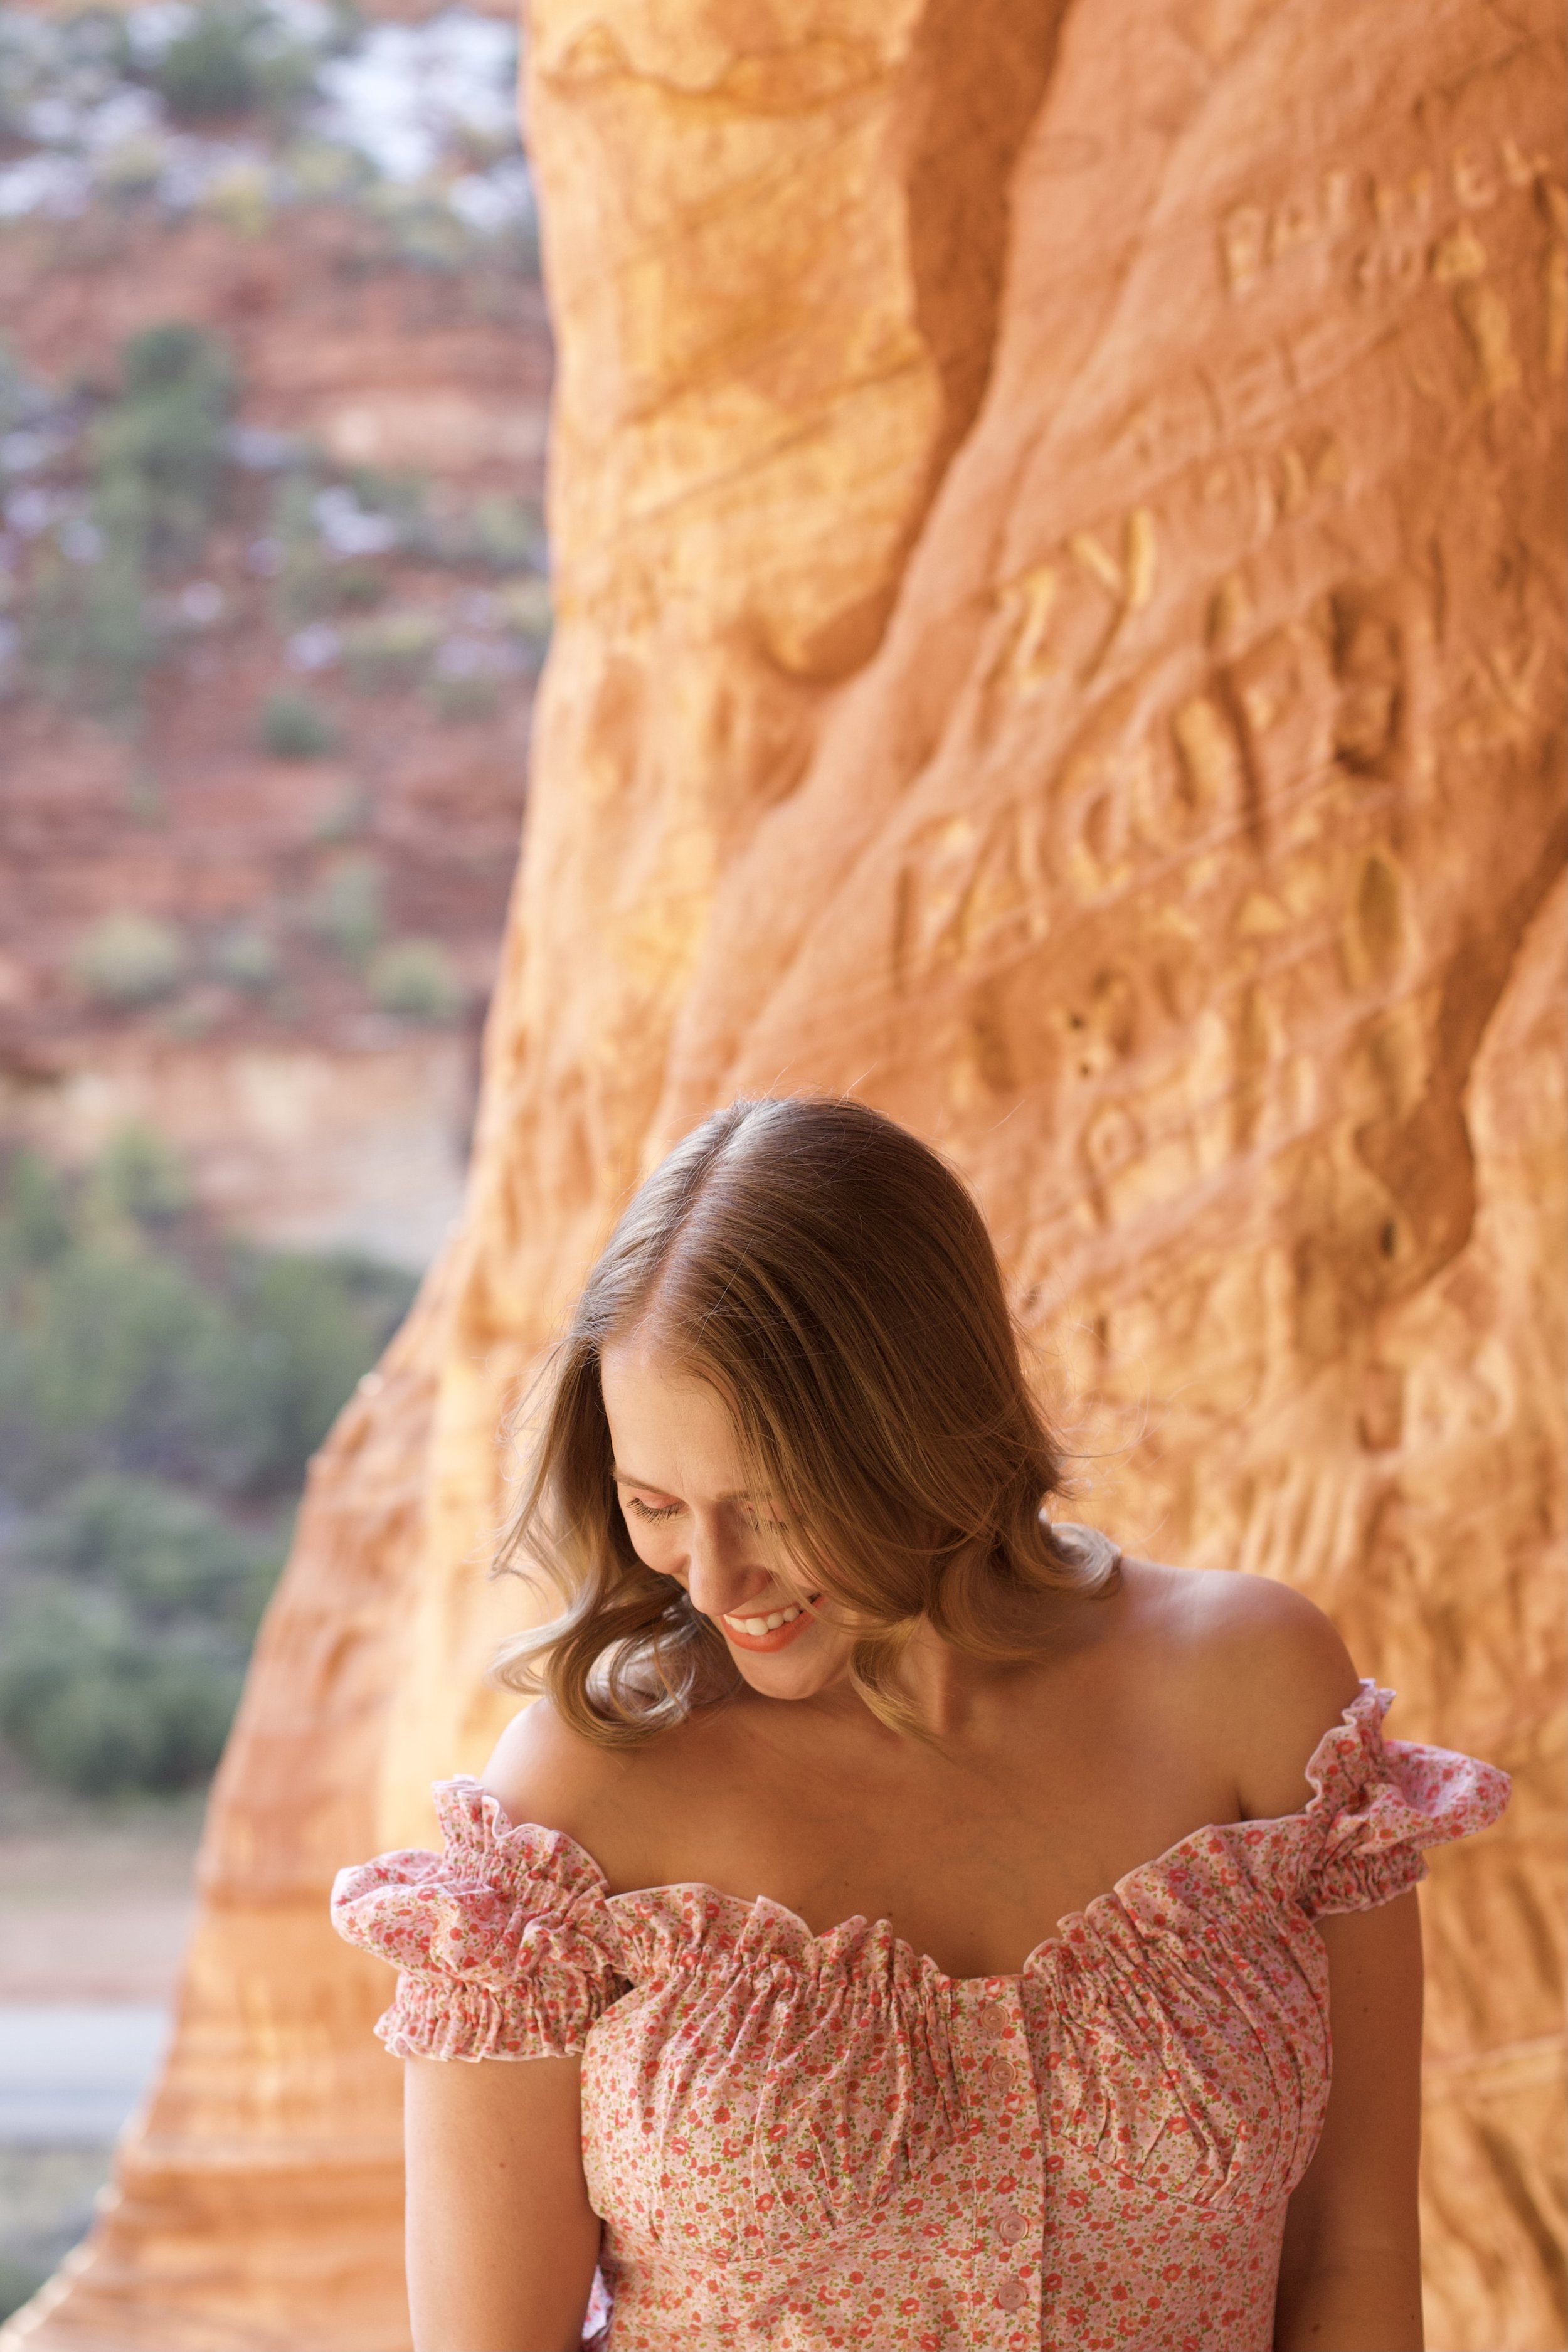
When I was choosing a fabric for the Minerva Ambassadors program this past month, I noticed that in the description for this printed poly-cotton I was drawn to, it said it was great for making toiles. I thought this was a great match for wanting to make a toile for a dress I’ve had my eye on. And since it was a cute print, it could very well be a wearable toile. The price point is really nice for any sewist on a budget, but still looking for a cute print. This fabric is a woven lightweight fabric that is 65% Polyester, 35% Cotton. I love the combination of the pink, red and orange flowers for a warm color palette. The flowers are dainty and sweet, but don’t scream children’s wear. The fabric was easy to sew with and pressed really well, which was perfect for the dress I made since it required quite a bit of pressing for the elastic channels that are part of the dress. The fabric isn’t fully opaque so depending on what you plan on making you might want to line the garment or use a slip underneath.
I’ve had my eye on the Alexia dress for a while and was loving the milkmaid style tops and dresses I was seeing on social media. I have a deadstock fabric I’ve been saving in my stash for a dress and I thought this was the perfect time to make a toile to make sure I had the fit I was going for before cutting into my other fabric. My current measurements are bust: 36, waist: 28, and hip: 41 in inches. I’m 5’1 so I went with the size 42 in the 154-160 height. Just an FYI with Viki Sews patterns you purchase each size individually and each size comes in different height options. This pattern goes up to a 45.5 inch bust and a 48-inch hip. I have never sewn a Viki sews pattern before so I didn’t know what to expect as far as instructions and finishing techniques for this dress. The instructions have photographs instead of illustrations, which isn’t my favorite and can be tricky for beginner sewists, but I didn’t have any trouble with making the dress. I also learned a new finishing technique. If you are using a serger the instructions call for a rolled hem finish on parts of the neckline and sleeves. I thought it was going to be complicated to change my serger settings to make this happen, but it was actually super easy and I loved how it turned out. I’m definitely going to be using this finish more often. I also like that with this dress you can wear the sleeves up on your shoulders or off the shoulders. I love those little extra details that make a dress more versatile. I’m excited to try more of Viki’s patterns.


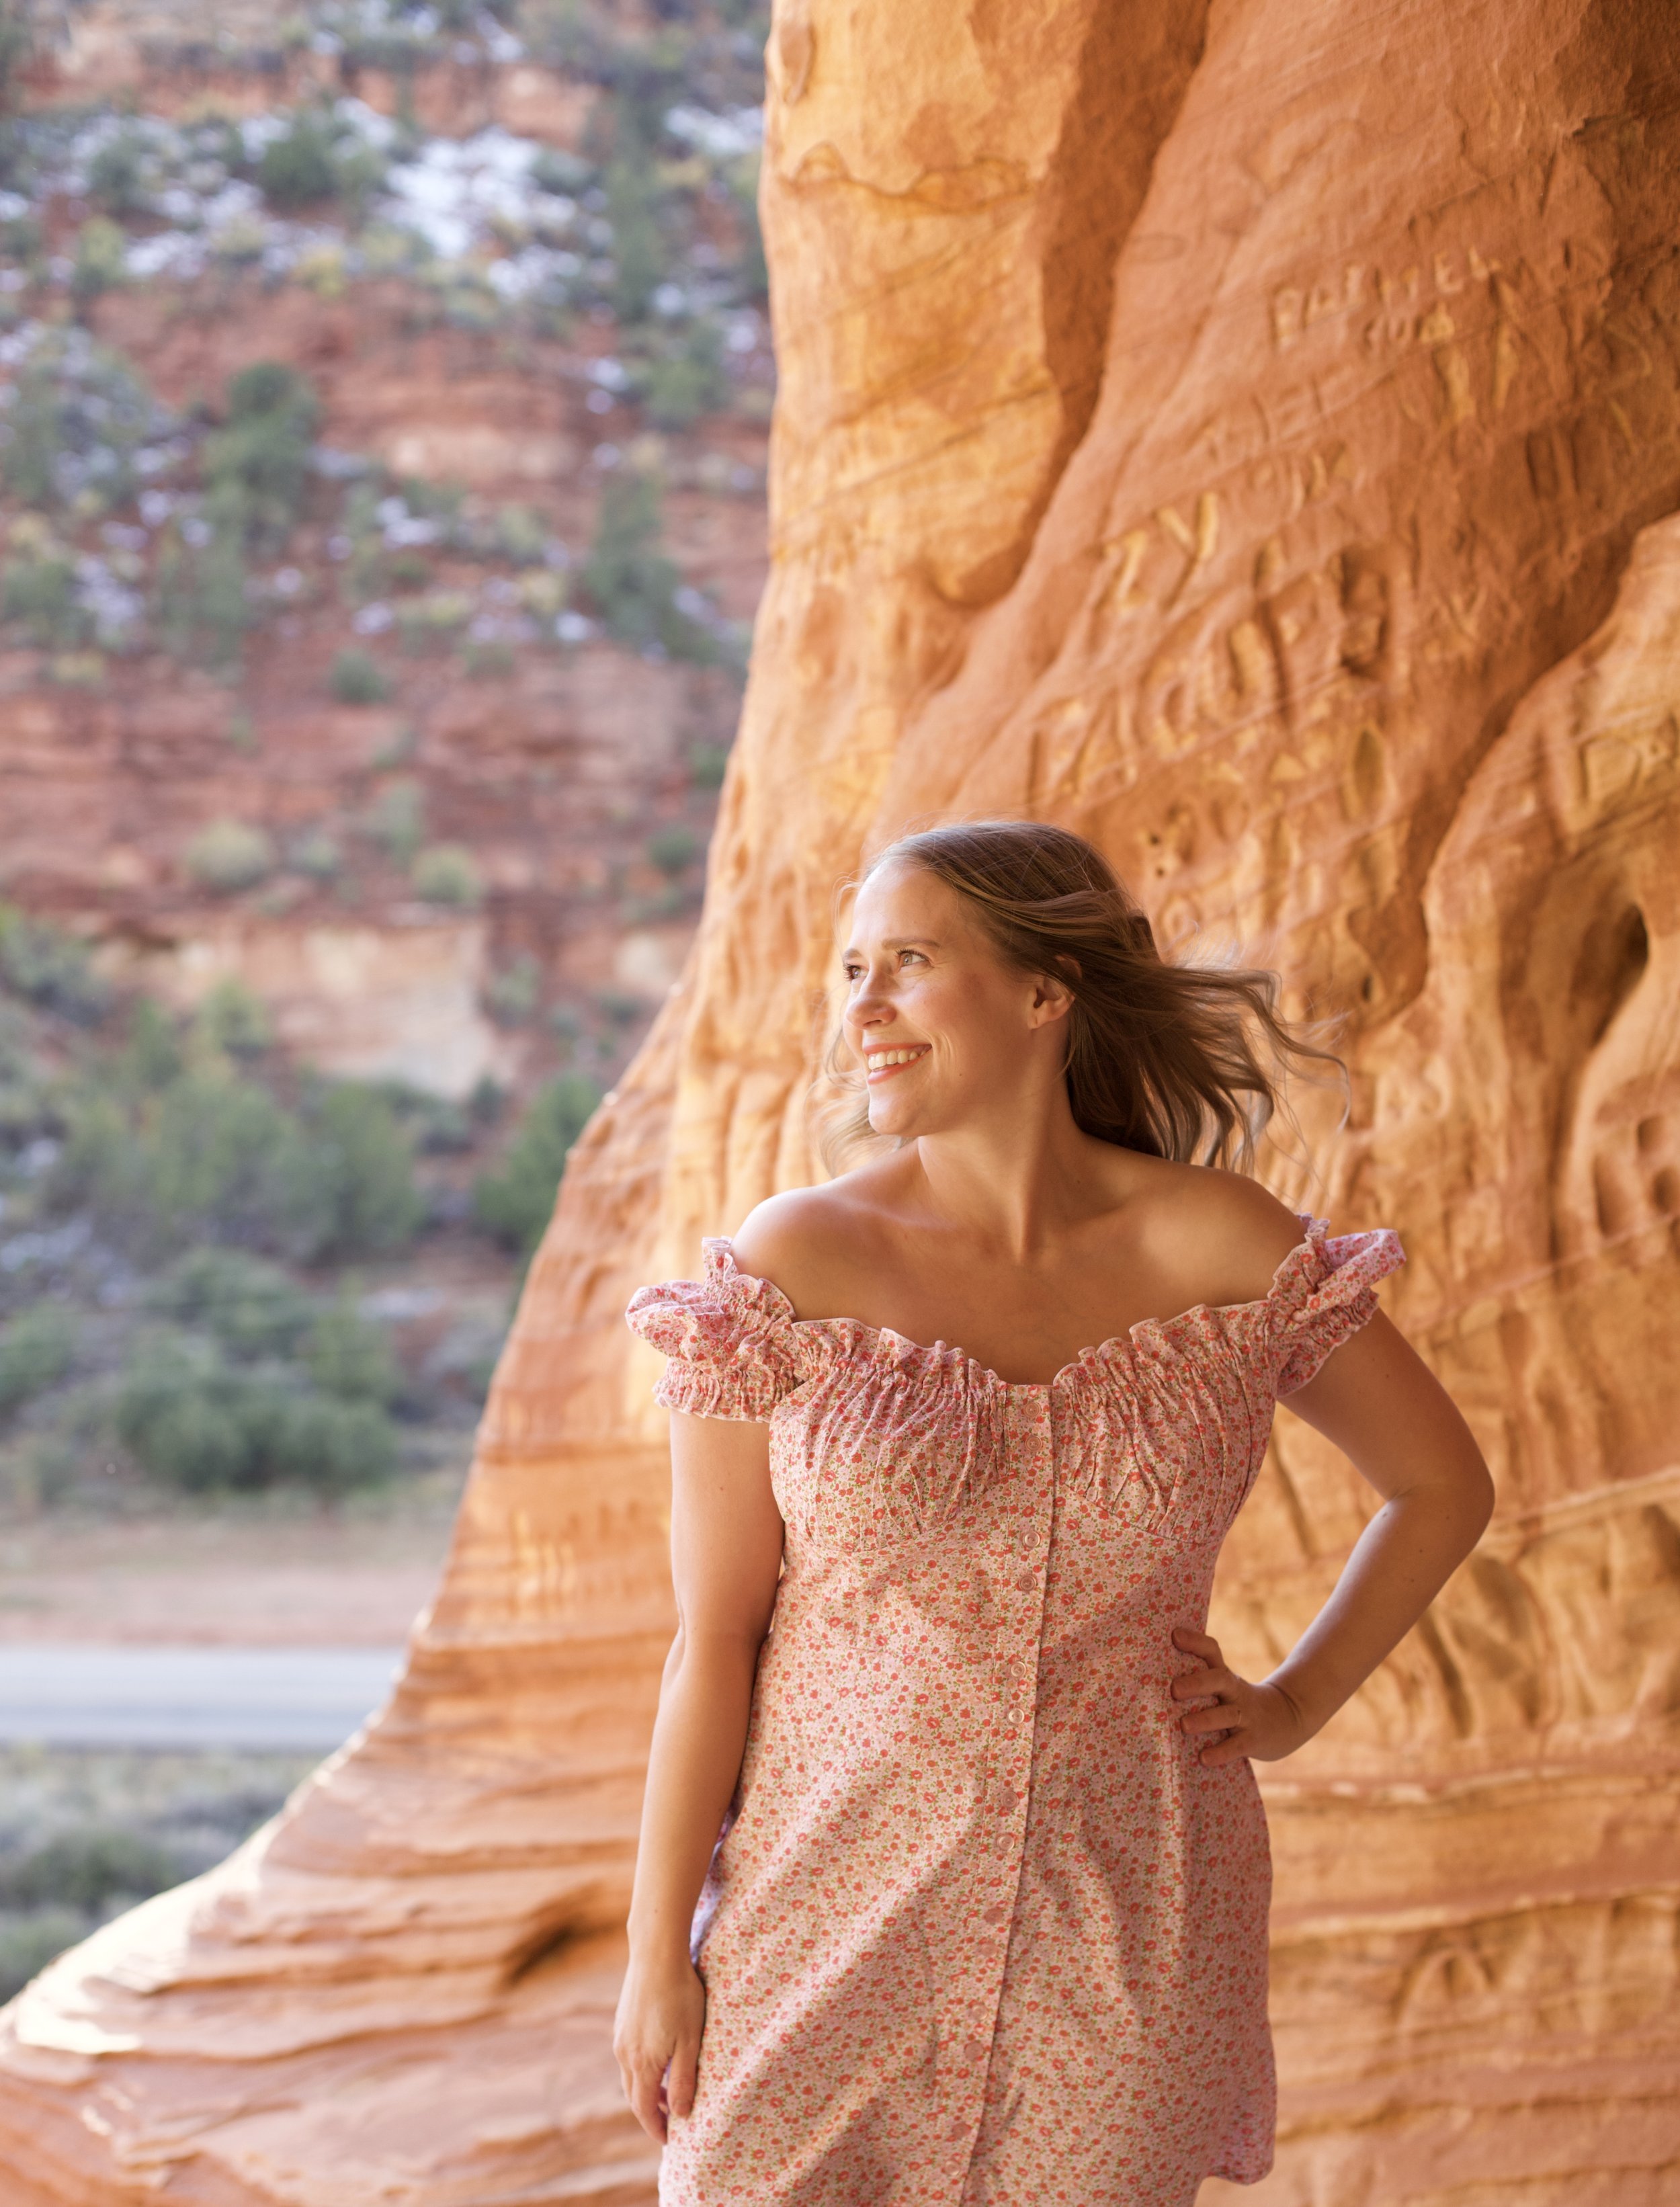
I was pretty amazed that the overall fit for this dress was great. I don’t think I need to make any adjustments other than making it a little bit longer, which is just a style preference vs. a fit issue. I’m also excited, since I like the fit, to play around with changing the shape of the skirt to create a bit floatier feel to it. That’s another great part of working on the fit of garments, it's much easier to pattern hack when you already know how something fits your body.
This photo was taken on the indigenous land of the Southern Paiute People.